Wednesday, July 18, 2012
Gone Fishin'
Continuing internet problems and real-life issues has forced me to put my ACing on hold for the time being. This blog will be going on temporary hiatus. I will hopefully return in time for the big August patch. Until then, happy adventuring!
Thursday, July 5, 2012
Sightseeing down south
I apologize for the recent slowdown in posts. I've had a lot of real-life distractions cutting into my AC time, including a persistently unreliable internet connection. I have, however, been up to things.

The Undead Mechanic quest led me to Lin, a mountain town in the south of the Sho lands. I always thought it had pretty good design; Nestled in a valley with large mountains on either side, it feels secluded and homey. Buildings stand not only on the floor of the valley, but atop the mountains and terraces. One thing I'd forgotten is that the local bartender is chattier than most: a bunch of rumors are sitting there, and many of them look worth following up on. First things first, though. Another alloy piece is hidden in here:
Saadia's Retreat

If my Magic Resist wasn't up to snuff, this dungeon would be hellish. I mean, just look at that text window! It was like that from the moment I portalled in. The mosswarts in here do more than just debuff, too. Fortunately I'm a total badass and plow through them like a lawnmower, collecting a ludicrous number of Swamp Stones along the way. If I were lower level, though, it wouldn't have been so much fun. Here I am standing at the eye of a storm of steel:

Aside from the sheer number of mossies, the dungeon poses little challenge, but I give props for the effort put into aesthetic design, including a highly vertical layout and an elegant but understated throne room. Can you imagine this design with 100+ level enemies? I shudder to think.
A Small Ruin

A generically-named dungeon that I expected to be another place full of outdated spawns, but which is actually comparable to the above-ground area. Drudge Lurkers, Granite Golems, and a lever puzzle guard a runed chest. The room in the above screen was full of particle effects, for no readily discernable reason. Short and simple, but satisfying enough for its length.
Rocky Crypt

Sorry about the lame pic, but I didn't stick around here long. I was drawn by rumors that it was packed with golems, which are some of my favorite mobs to hunt. (Motes, hearts, not overly tough but a challenge -- what's not to like?) Well, it was, but unfortunately among them were Iron Golems, which are way out of my league. I get killed in short order, make a quick corpse run to get my items back, then decide to leave this for later.
Incidentally, I don't know what that thing in the screenshot is. It's neither solid nor clickable. It's sitting right on top of the portal drop, the green arrow oriented in the direction that you're standing, so I assume it's some debug-mode thing for developers that someone forget to make invisible.
Golem Burial Grounds

This was more like it. Lots of 60-80ish golems in a medium-sized but easily navigable dungeon. Some nice-looking rooms, too. What sticks out most in my mind, however, are these:

Yes, there's an enemy there. It's a Mist Golem, made of nearly-transparent particle effects and hard to spot without the radar. They pose a bit of a problem since my sticks do jack to them, luckily they are not so invulnerable to my frost handwraps.
I have little to say about the dungeon, although I did enjoy it. Lots of Golems, Runed Chest at the end, fun times. Apparently it was a popular location to grind for motes in earlier days. I was tempted to stay a while and test that out, but I'm not really the grinding type.
Thieves' Galleries

The lore here is that someone pulled an art heist and stuck the pictures in here, then got chased out by a crew of Banderlings. It's a nice little dungeon, but the whole "dungeon/gallery" thing's been done before in the Dungeon Gallery Tower. A brief and linear crawl culminates in a runed chest. Not bad, but nothing great either.
In addition to the dungeons, Lin has a lot of overworld sites worth a visit. Not only are they aesthetically appealing, but they often hold runed chests. Here's the so-called "Dead Cave", with it's Lich Lord inhabitants:

The training camps northeast of town:

The "Old Keep" (Known as the "Lin Lich Tower" before the Liches were replaced with Dark Revenents),

The Golem Spire, which I gave a pass after getting a taste of the guards:

An Empyrean shrine of unknown purpose, complete with Runed Chest (not shown: Dark Leech, Dark Revenants, and Granite Golem respawning unnaturally fast):

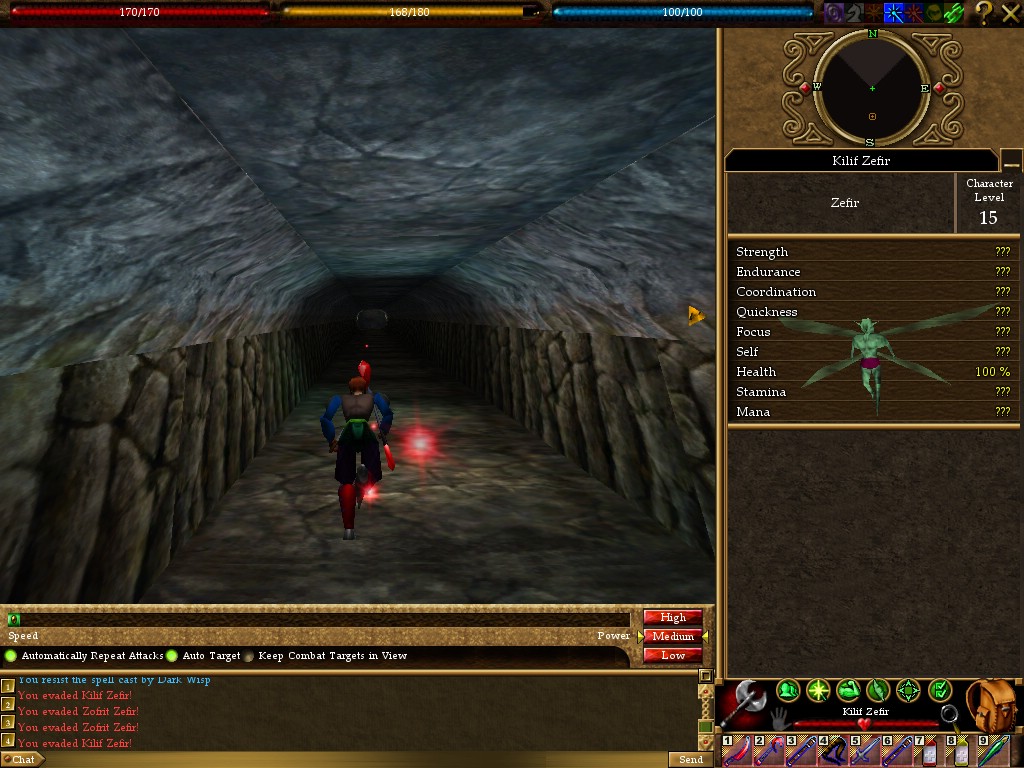
Last but not least, there's the Zefir cave, home to the Minor Sparking Stone, some lore documents, and a bunch of Zefirs. I raid the place, but leave the loot. Minor Atlans are pretty much useless unless you need Writs of Refuge, which I don't.

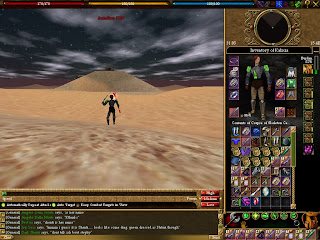
And that's how is was. A nice week. Some fresh air, some Golem-bashing... Lin is a ideal vacation spot for the discerning Derethian adventurer. Current stats:

Tuesday, June 26, 2012
Snake, snake, it's a snake!
After a promising start, my week slowed to a crawl. This wasn't entirely the game's fault, although I did have a run of unremarkable dungeons. I've been distracted by some other things and haven't had a lot of time to play recently. So, if this post seems a little unenthused.... well, you know why.

Since I already did the pre-req for this quest, I decided to run it next. Basically, since I helped Nuhmidra out, I now get to help out her allies. The reward for doing so is a build-your-own magic necklace, albeit with somewhat dated enchantments. After the first room, the dungeon splits into three different sub-dungeons, each with a different base necklace inside. The harder the dungeon is, the better the necklace.
Dungeon design is so-so: square floors cut into compartments like some sort of Derethian cubicle farm, big pits in the center that the daring can jump into for a shortcut. The quest items are scattered around on the lower floors. As for the enemies: tons of Sclavus. Aside from the venture into Folthid Cellar, I don't remember fighting many Sclavus. If the ones around here are any indication, I'd like to avoid them in the future. They spam War Magic. The lower-level ones aren't so bad, but the hardest dungeon contains some real problematic ones. The room in the shot above allows me to fight with doors, negating their advantage of numbers. But those doors are only near the beginning, and I'm not sure how far down I'll have to go to find the necklace. So I take a chance and jump into the pit. Surviving the fall, I poke around a little and barge into a nest of a half-dozen or so Sclavus. Urk! Doubling back, I take another path and find the object I'm looking for. Not bothering to stick around and fight, I grab it and rush back to the exit portal on the lowest level.
So I get out with the highest-level necklae, unfortunately enchanting it requires Amulets I don't have, and before I can wear it I'll need a replacement for the Coordination V spell on my current necklace. I've got some ideas on both, but it might be a while before they come to fruition. So let's ease on down for now.
Tomb of the Dead

This redundantly-named dungeon is a bit of a walk from Tufa. The wiki warns me about spawn traps and lever puzzles, but not about the fact that you can't take two steps without another damn Risen Soldier spawning.

First, however, I portal in to Tufa and take a look around. At release, Tufa was a sleepy oasis town with little going on. That changed after the Shadow Spire attack. The same day Arwic was blown off the map, Tufa likewise went ker-blammo. The natural spring that was the reason for Tufa's existence (in theory, anyway), was turned into a waterfall, which you can just see on the right side of this shot. In the distance, note the charred ruins of a former house. Apparently, the shadows' objective was to destroy the Menhir ring buried underneath the town. They did a crappy job, as the ring is not only still there, but still attunes for the Menhir Rings quest. Unfortunately, the town itself has never been rebuilt, and to this day the bartender is hanging out by a small cooking fire, encouraging passers-by that his place will be rebuilt "next month".
Anyway, after a bit of sightseeing, I head out to the dungeon I came for. It does indeed have spawn traps, which spawn Risen soldiers. I fight them off easily, but the constant respawns from the traps gets annoying. Especially since they all spawn with missile weapons, meaning I have to charge them to distribute the smackdowns instead of them coming to me. Which in turn means that when they drop dead, I'm standing right atop the spawn trap and a single step respawns them again. Eventually, I get sick of this and just start running through the trapped rooms. In addition to the Alloy Whatsits, there's a number of pickable chests in the dungeon, which results in some valuable loot. Not worth the aggravation, though. In my opinion.
Northern Black Claw Dungeon

Crater Pathway
I have go through this cave to get to the Crater Village and meet one of the Journeyman Cooks. Last time I took the overland route, because I'd hear there was an exploration marker there. (There wasn't. Or if there was, I didn't find it.) Today I take this path. It's short and sweet, with a lot of long upward tunnels and low-level Zefirs. I tie to the portal at the end so that I don't have to go through the run from Neydissa again next week, but that may prove a moot point. The quests only earn me five points in each skill, and I'm not sure that's worth the tedium involved. Still, it is free experience.
Dungeon Binar

Ran this dungeon after picking up a rumor in Tufa. The description sounded similar to Daiklos, which was surprisingly enjoyable. Binar is indeed kinda similar -- good map and lots of chests -- but unlike Daiklos, the spawns haven't been updated since release. Hence, I spent some time beating up Skeletons and Rats, and loot the chests for some okay stuff. Not bad, but if you want to just grind chests and bash low-levels for awhile, you're better off going to Daiklos.
Short post today. Like I said, I was busy. But my next stop is Lin, which at a glance is looking to have quite a bit going on. Current stats:


Wednesday, June 20, 2012
Side trips
This was a rather good week. Instead of continuing with the Undead Mechanic Quest, I took some time to run sidequests, and they turned out to be fairly well-designed.
The Underground Forest

As some of you may have guessed from the portrait at the end of my last post, my next stop was The Underground Forest, a kind of Derethian tourist attraction around Glenden Wood. In theory, it's a really, really cool idea: an enchanted forest in the middle of a dungeon. In theory. In reality, it's kinda like Mount Rushmore or the Grand Canyon: you get psyched to go there, see it, and then it's like, "meh, it's a cave with trees." I did get a couple of good shots, though:


Thorsten Cragstone's Armor (Mostly-aboveground Quest)

In addition to local dungeons, I found a few rumors in Glenden Wood that merited some follow-up. One took me to a Cragstone resident by the name of Glysander Cartoth, who wanted me to find his missing sister, Lania. To do so, I have to follow the trail of some letters sent to her by Elysa Strathelar. Apparently, they were childhood friends who somehow both found their way to Dereth separately. Glysander sent a man named Brontynn Marshad to hunt down these letters, but he's gone incommunicado. I'm told to look for clues at a hut along the Eastham beach, which is why you see me jogging away from Moarsmen up above. Not that I couldn't take level 30s, I just don't have the time to fight every last mob I encounter while searching for points of interest around Dereth. Especially when I get lost and have to check the wiki for coordinates.

Eventually, I find Marshad's place, where a locked chest holds two letters. One is from Elysa to Lania, and shows our monarch in a depressed mood, nostalgic for simpler times. (It was written shortly after the final battle of the Olthoi War, which saw her beloved Thorsten Cragstone slain by the Olthoi Queen.) The second letter is from Marshad, informing me that he's gone to investigate another lead north of Imuth Maer Doquin. If you don't know, this is an old landmark dating back to release -- an abandoned Empyrean city. It housed nothing for a long while before becoming home to a portal to the Halls of Metos. Since I used that portal while running the Metos quest, I know where Imuth Maer Doquin is, so I head out to find Marshad... and I get lost and have to check the wiki for coordinates. This is a running theme with overworld explorations.
I finally find Marshad, who's been captured by Tumeroks. I have to duke it out with them to get into the tower where Marshad is held captive. Lucky I brought my Assault Staff, isn't it?
I finally find Marshad, who's been captured by Tumeroks. I have to duke it out with them to get into the tower where Marshad is held captive. Lucky I brought my Assault Staff, isn't it?

Marshad is apparently institutionalized or something, as he refuses to make any attempt at a getaway after I've killed all his jailers. But he gives me a pair of letters, which, after a brief stopover at Baishi to talk to an NPC, sends me to:
The Underground City

This dungeon is known for two things: First, for being the headquarters of the human resistance during the Olthoi Wars, and second, for being the most hideously complicated dungeon in all of Dereth. I'm serious, just take a look at the map!
There is, unfortunately, very little for me to say about it. It was a nice place for lowbies to grind way back when, but the spawns are hopelessly out of date today. I wander around bashing low-level drudges and mosswarts, and of course I get lost hopelessly. This time I can't check for coordinates, but I manage to eventually blunder into Thorsten's tomb anyway. From there, I follow the directions to find the portal to:
Hidden Dungeon

Which is a little more challenging, stocked with Golems and Liches. It's not particularly spectacular: just stick to the right-hand wall and it's a straight shot. But it's entertaining enough that running it twice because I miss Lania's corpse in the last room is no big deal. More Golems means more chances for hearts (I find a few) or motes (no dice). My reward for all this? One of the best drop items in the game:

Sw33t. ^_^
I have to say I liked this quest. Getting lost in the overworld was annoying, but it's some variety, and when you do get lost you have the wiki. The rewards, including the chance at Golem loot and experience from Glysandor, are worthwhile. The peek into the character of Elysa Strathlaer is interesting too.
Precarious Sojourn

The other rumor I pick up in Glenden Wood has me dragging myself to a seedy-looking gentleman named Slithe Tradditor, who lives in a small cottage out near Lytelthorpe. He sends me in search of a dungeon. Predictably, I get lost -- once finding the house, and twice finding the dungeon -- and have to check the wiki for coordinates. On the plus side, I find a mote and a Dark Sliver over the course of getting lost, so that's good. Once I reach the dungeon itself, the view is more than worth the trip:

Yes, Precarious Sojourn is basically the Sanamar Lighthouse on steroids. I battle Risen Knights along a series of platforms en route to a large tower floating in the sky, which Tradditor says is my goal. The Knights, or "Warriors of the Blood", are strong but easily dispatched. The final battle is, of course, on the roof of the tower:

In addition to the pedestal that I'm here to take a picture of, there's an unexpected reward for reaching the top:

That's Alatar Locke, a semi-important figure in the lore. Why he sticks around here with the undead about, I have no idea, but he gives me a map of Dereth. After jumping through a few hoops, I have a nice decoration for my wall:

I return to Slithe with the image he needs to replicate the Arcane Pedestal, but this quest isn't over yet. Now we have to gather some objects for him to make the pedestal. The first is a Gelidite Dais, for which I get sent to:

The above screenshot is a little misleading. While you are indeed fighting elementals early in the Gelidite Library, the main body of the quest takes place in an empty sub-dungeon called the Labyrinth. In fact, getting to the Library is the toughest part. It's in the vicinity of Stonehold, a dangerous area with high-level spawns. They're spaced out enough that I can dodge around them, unless I get hit with internet problems. I lose connection while auto-running and log back in at the lifestone. I then almost die again retrieving the corpse, in itself a fairly stupid idea since all I lost was unnecessary drop items. Fortunately, luck is on my side and I just manage to get out alive via my last Gem of Worth. I then spend the rest of the night burning off vitae in the Serpent Clan Training grounds, finally managing to grab the Assault Sword for my trouble, as well as enough gems to last me a bit.
The next day, I get back to the Gelidite Library. Curiously, the NPC at the entrance behaves like I've already run the quest. It may be flagged at the account level or something. I fight through the elementals, and then get down to the Labyrinth. The Labyrinth, as I mentioned before, is empty of enemies. Instead, you're hunting down eight pages of a text within a sequence of twisty tunnels. A golem at the end will give you access to an Oubliette after collecting all eight. All I really need is the dais from the golem room, but for completeness sake I run the entire quest anyway, and get into the Oubliette:

The backstory behind all this is that during the game's third year, Nuhmudira was kidnapped by Gaerlen, imprisoned here, and tortured. Nuhmudira had done some very bad things, and the players were given the opportunity to decide her fate: a second chance or indefinite imprisonment. (Of course, it turned out Gaerlen really wanted to use her life force to power some magical ritual or other, but never mind that.) Nuhmudira eventually escaped, but for some complicated lore reason some echo of her remains in this place, or somesuch. She pleads for mercy in the form of desperate notes scattered around this room, then you decide who to side with. I choose mercy, because I'm that kind of an idealist.

The last phase of the Arcane Pedestal quest takes me to three of the four foundry dungeons. These dungeons exist under the bronze statues that stand in each of the towns of Dereth, statues that were intended to protect the towns, but then fell to enemy control and had to be nullified. The foundries are still open, and stuffed to the gills with giant statues. The quest itself is a grinding quest: farm three specific statues in different dungeons for a trophy item, then take them all to Slithe. While not my cup of tea, it's at least not too hard. Once I know the statues vulnerability is acid, the first two go pretty easy.
The third, however, is tougher. The statues here are level 100 and tossing around level 6 War Magic, so I can't get any further than the first room. Instead, I hide behind a wall and lure them out one by one. One-on-one, I can handle them, it's only when I've got three or more against me that things get dicey. On the plus side, the armor drops are very, very good, and I've made a few choice improvements to my suit by the time the spring I need drops. My reward? A scale copy of the Arcane Pedestal, which turns out to be... a useless floor decoration. Kind of an anticlimax. Slithe is as disappointed as I.
Current stats:

Yeah, I know. Fashion disaster with about five different colors, but hey, points is points and tailoring is expensive. And yes, I am dual-wielding assault weapons. Tumeroks beware!

That's Alatar Locke, a semi-important figure in the lore. Why he sticks around here with the undead about, I have no idea, but he gives me a map of Dereth. After jumping through a few hoops, I have a nice decoration for my wall:

I return to Slithe with the image he needs to replicate the Arcane Pedestal, but this quest isn't over yet. Now we have to gather some objects for him to make the pedestal. The first is a Gelidite Dais, for which I get sent to:
Gelidite Library & The Labyrinth

The above screenshot is a little misleading. While you are indeed fighting elementals early in the Gelidite Library, the main body of the quest takes place in an empty sub-dungeon called the Labyrinth. In fact, getting to the Library is the toughest part. It's in the vicinity of Stonehold, a dangerous area with high-level spawns. They're spaced out enough that I can dodge around them, unless I get hit with internet problems. I lose connection while auto-running and log back in at the lifestone. I then almost die again retrieving the corpse, in itself a fairly stupid idea since all I lost was unnecessary drop items. Fortunately, luck is on my side and I just manage to get out alive via my last Gem of Worth. I then spend the rest of the night burning off vitae in the Serpent Clan Training grounds, finally managing to grab the Assault Sword for my trouble, as well as enough gems to last me a bit.
The next day, I get back to the Gelidite Library. Curiously, the NPC at the entrance behaves like I've already run the quest. It may be flagged at the account level or something. I fight through the elementals, and then get down to the Labyrinth. The Labyrinth, as I mentioned before, is empty of enemies. Instead, you're hunting down eight pages of a text within a sequence of twisty tunnels. A golem at the end will give you access to an Oubliette after collecting all eight. All I really need is the dais from the golem room, but for completeness sake I run the entire quest anyway, and get into the Oubliette:

The backstory behind all this is that during the game's third year, Nuhmudira was kidnapped by Gaerlen, imprisoned here, and tortured. Nuhmudira had done some very bad things, and the players were given the opportunity to decide her fate: a second chance or indefinite imprisonment. (Of course, it turned out Gaerlen really wanted to use her life force to power some magical ritual or other, but never mind that.) Nuhmudira eventually escaped, but for some complicated lore reason some echo of her remains in this place, or somesuch. She pleads for mercy in the form of desperate notes scattered around this room, then you decide who to side with. I choose mercy, because I'm that kind of an idealist.
Bronze Statue Foundries

The last phase of the Arcane Pedestal quest takes me to three of the four foundry dungeons. These dungeons exist under the bronze statues that stand in each of the towns of Dereth, statues that were intended to protect the towns, but then fell to enemy control and had to be nullified. The foundries are still open, and stuffed to the gills with giant statues. The quest itself is a grinding quest: farm three specific statues in different dungeons for a trophy item, then take them all to Slithe. While not my cup of tea, it's at least not too hard. Once I know the statues vulnerability is acid, the first two go pretty easy.
The third, however, is tougher. The statues here are level 100 and tossing around level 6 War Magic, so I can't get any further than the first room. Instead, I hide behind a wall and lure them out one by one. One-on-one, I can handle them, it's only when I've got three or more against me that things get dicey. On the plus side, the armor drops are very, very good, and I've made a few choice improvements to my suit by the time the spring I need drops. My reward? A scale copy of the Arcane Pedestal, which turns out to be... a useless floor decoration. Kind of an anticlimax. Slithe is as disappointed as I.
Current stats:

Yeah, I know. Fashion disaster with about five different colors, but hey, points is points and tailoring is expensive. And yes, I am dual-wielding assault weapons. Tumeroks beware!
Monday, June 11, 2012
Finding your way.
I unfortunately didn't get much done this week, and what I did get done doesn't make for especially interesting reading. On advice from an anonymous commentator, I picked up some Massive Mana Charges, hoping they would fix the drop-item problem I ran into two posts ago. Result were... well, inconclusive, since I didn't die and was in no hurry to do so, but I have some more free space in my pack now. With that done, my quest for some spiffy boots continues in Nanto:

Empyrean Garrison

I thought this dungeon was interesting while running it, but as I remember very little of it now, maybe not. It's another drudge dungeon, which means the challenge level is low. Some respectable effort is put into design, which is complex but navigable and includes a tricky lever puzzle, but without decent monsters it has no bite. I grab the Alloy Whatever with little trouble then move on.

I hit this for completeness' sake. You'll recall the last time I was in Nanto, I tried to run it, but turned back before the entrance because the mobs outside were too much for me. Those same mobs are still around, but this time I'm able to get through them. The dungeon itself is not worth the trouble, being pretty much exactly what it says: a small dungeon full of various low-level rats. I leave and bash the monougas outside instead to make the trip worthwhile.


A pair of dungeons near Al-Arqas, one tackled for a Alloy Thingamajig, the other because it's there. Neither is terribly remarkable. The Bone Lair is home to skeletons and a few lever puzzles. The Desert Ruin feels like a first draft of Musansayn's Vaults, with drudges everywhere and a lot of bookshelves. It looks really good from the overworld, though:
I feel like there should be something more impressive in a place like that. Seeing something like that on the horizon and trekking out there only to find another drudge-bashing dungeon feels anitclimactic.
The next Alloy Piece is in Glenden Wood Dungeon, which I've covered already, but while in town, I take a surprisingly-rewarding side-trip:

Since I'm running a lot of obscure content, it's not common for me to find signs of other adventurers. So it's surprising to me that right at the start of Daiklos, an old dungeon of no real quest or lore significance, I find drudge corpses left behind by a recent visitor. Deeper inside, another dungeoneer has left his corpse. The reason for this appears to be twofold; one, a rich spawn of level 40 Drudge Lurkers (A kill-task is out on them, I think,) and two, a large number of chest throughout the dungeon holding better-than-average loot. I imagine people visit her to farm drudges and MMDs. Nice to see some old content getting used, isn't it?
Also, may I just say that the Viamontian invasion of Glenden Wood is a complete farce? They've barricaded the roads and not much else. And even if you ignore the town network, it's still dead easy to run around the roadblocks without even aggroing the knights or eaters. No wonder that war wound up as a stalemate.
(Well, that and a critical component of the army -- the players -- was playing both sides.)

Somewhere amidst all of this, I finally decided on a (somewhat) concrete path for my future development. I've decided I want to be a low-magic melee. Why? Largely because of the added challenge factor, but also because trade skills instead of spells offers the possibility to spend skill points on Defense skills. To this end, I take a trip to these two temples to untrain Life Magic and pick up some spec gems for later use.
When you think about it, the whole concept of these dungeons is kinda silly. I mean, I get why they exist; It was probably much easier on the code to do it this way than to amend the UI. What I don't get is why respeccing your character requires dragging yourself off to the rear end of the map, solving a somewhat-obscure puzzle that will send you back to town cursing if you don't know to expect it, then an (admittedly somewhat trivial) dungeon-crawl past some Golems. At the time, Turbine seemed to be operating under the idea that everything must be a quest. Or maybe that everything must be justified in the lore. I dunno.
In any event, the run to get to the temples is a bigger problem than anything else, taking me through areas with very high level spawns. Occasionally I stop to fight something interesting, but mostly I just put that 200+ Quickness to use. I untrain Life Magic and train Alchemy and Cooking instead. I keep Item Magic because I'll need portal magic for the foreseeable future. I grab a gem and spec Arcane Lore, since even under the best of circumstances I'll need to cover some buffs with my gear, and grab spec gems for the three defense skills. I may or may not wind up using them, however. If the wiki is correct, I should have 24 skill credits coming between now and the level cap. With the four I have now and four others earned from quests and luminescence, that makes 32. Speccing all three defenses will cost 26, which will be doable by level 180. This is fine unless I decide to take tinkering skills at some point. Which is likely; I've heard good things about Rending and Gearcraft. The options going forward may involve untraining Missile D or Item Magic, or juggling tinkering skills with them via the Temple of Forgetfulness. Right now my priority is to get Melee D specced, since hard-hitting melees are starting to give me trouble. Of course, the long-term question here is "Is 28 points in your defense skills relevant?" If not, I'll just trash the gems and have more than enough skill credits to take tinking.
In any event, we'll deal with that when we deal with that. Right now, I've got new skills to play with, so I also run the crafter quests for Alchemy and Cooking. I'm not sure if it's worth the trouble. Alchemy isn't too bad; Once you've got the necessary tools, you just set up camp at any archmage, craft nine items, than make the deliveries. The Cooking Quests, however, require you to run all over the place tracking down ingredients, then drag the finished products to places like Bandit Castle and Crater Village. Annoying, but hey, combat experience is capped and direct experience isn't. Since I don't have a pressing need for beers or phials right now, I don't need to boost them with combat exp just yet.
My stats at this point:

Nanto Rat Nest

I hit this for completeness' sake. You'll recall the last time I was in Nanto, I tried to run it, but turned back before the entrance because the mobs outside were too much for me. Those same mobs are still around, but this time I'm able to get through them. The dungeon itself is not worth the trouble, being pretty much exactly what it says: a small dungeon full of various low-level rats. I leave and bash the monougas outside instead to make the trip worthwhile.
Matron Hive South


Bone Lair & Desert Ruin

A pair of dungeons near Al-Arqas, one tackled for a Alloy Thingamajig, the other because it's there. Neither is terribly remarkable. The Bone Lair is home to skeletons and a few lever puzzles. The Desert Ruin feels like a first draft of Musansayn's Vaults, with drudges everywhere and a lot of bookshelves. It looks really good from the overworld, though:

I feel like there should be something more impressive in a place like that. Seeing something like that on the horizon and trekking out there only to find another drudge-bashing dungeon feels anitclimactic.
The next Alloy Piece is in Glenden Wood Dungeon, which I've covered already, but while in town, I take a surprisingly-rewarding side-trip:
Daiklos

Since I'm running a lot of obscure content, it's not common for me to find signs of other adventurers. So it's surprising to me that right at the start of Daiklos, an old dungeon of no real quest or lore significance, I find drudge corpses left behind by a recent visitor. Deeper inside, another dungeoneer has left his corpse. The reason for this appears to be twofold; one, a rich spawn of level 40 Drudge Lurkers (A kill-task is out on them, I think,) and two, a large number of chest throughout the dungeon holding better-than-average loot. I imagine people visit her to farm drudges and MMDs. Nice to see some old content getting used, isn't it?
Also, may I just say that the Viamontian invasion of Glenden Wood is a complete farce? They've barricaded the roads and not much else. And even if you ignore the town network, it's still dead easy to run around the roadblocks without even aggroing the knights or eaters. No wonder that war wound up as a stalemate.
(Well, that and a critical component of the army -- the players -- was playing both sides.)
Temple of Forgetfulness & Temple of Enlightenment

Somewhere amidst all of this, I finally decided on a (somewhat) concrete path for my future development. I've decided I want to be a low-magic melee. Why? Largely because of the added challenge factor, but also because trade skills instead of spells offers the possibility to spend skill points on Defense skills. To this end, I take a trip to these two temples to untrain Life Magic and pick up some spec gems for later use.
When you think about it, the whole concept of these dungeons is kinda silly. I mean, I get why they exist; It was probably much easier on the code to do it this way than to amend the UI. What I don't get is why respeccing your character requires dragging yourself off to the rear end of the map, solving a somewhat-obscure puzzle that will send you back to town cursing if you don't know to expect it, then an (admittedly somewhat trivial) dungeon-crawl past some Golems. At the time, Turbine seemed to be operating under the idea that everything must be a quest. Or maybe that everything must be justified in the lore. I dunno.
In any event, the run to get to the temples is a bigger problem than anything else, taking me through areas with very high level spawns. Occasionally I stop to fight something interesting, but mostly I just put that 200+ Quickness to use. I untrain Life Magic and train Alchemy and Cooking instead. I keep Item Magic because I'll need portal magic for the foreseeable future. I grab a gem and spec Arcane Lore, since even under the best of circumstances I'll need to cover some buffs with my gear, and grab spec gems for the three defense skills. I may or may not wind up using them, however. If the wiki is correct, I should have 24 skill credits coming between now and the level cap. With the four I have now and four others earned from quests and luminescence, that makes 32. Speccing all three defenses will cost 26, which will be doable by level 180. This is fine unless I decide to take tinkering skills at some point. Which is likely; I've heard good things about Rending and Gearcraft. The options going forward may involve untraining Missile D or Item Magic, or juggling tinkering skills with them via the Temple of Forgetfulness. Right now my priority is to get Melee D specced, since hard-hitting melees are starting to give me trouble. Of course, the long-term question here is "Is 28 points in your defense skills relevant?" If not, I'll just trash the gems and have more than enough skill credits to take tinking.
In any event, we'll deal with that when we deal with that. Right now, I've got new skills to play with, so I also run the crafter quests for Alchemy and Cooking. I'm not sure if it's worth the trouble. Alchemy isn't too bad; Once you've got the necessary tools, you just set up camp at any archmage, craft nine items, than make the deliveries. The Cooking Quests, however, require you to run all over the place tracking down ingredients, then drag the finished products to places like Bandit Castle and Crater Village. Annoying, but hey, combat experience is capped and direct experience isn't. Since I don't have a pressing need for beers or phials right now, I don't need to boost them with combat exp just yet.
My stats at this point:

Thursday, June 7, 2012
No contractual obligations
I wanted to move on to some contracts this week, but... that didn't quite work out. Either I'm gimped, or Turbine is not terribly great at assessing the difficulty of their content, because the contracts were way beyond my abilities. Before that, however, I got to one of the game's most old-school quests.

Yes, it's the Sword of Lost Light quest, one that goes back all the way to release. It was meant to be run by an allegiance, but it's still pretty awesome solo, if you've got the stats for it. It starts off with using my house chest to mule all the keys onto Kalixia. Then we visit Iquba (bartender at Qalaba'r) and Tibri (she of the fire spear) to gather intel. Together, the clues we gather lead us to the Carved Cave. I could look up the coordinates of the cave, but I'm feeling adventurous and decide to find it myself from Tibri's directions. It's a bit of a walk west of Al-Jalima, involving some mountain climbing (always an annoying prospect in AC,) but I find it without getting lost. On the way, I find a lifestone where a shadow armor crafter has set up shop, a dungeon that I make a note to come back for later, and an exploration marker.
Once I'm there, the cave itself shows up some very appealing level design. It's multi-level, with reasonable foes (not a challenge to me, but then again I'm almost twice the recommended level for this quest), and enough locks to be rewarding without being impenetrable to someone without lockpick. Basically, you run around a large, multi-level room full of monougas and skeletons, searching for a key. This unlocks a tunnel that leads you to another big room where you have to find another key and do some jumping. Then it's down another tunnel that spirals deep down to the final room, where you find a surprise:

Yes, at release this dungeon was the only place in the game where you could find shadows. They didn't appear throughout Dereth until a few months later. Cool, isn't it? Well, I think so.
Victory earns me the seventh and last Lost Light Key, and a portal in the chamber takes me right to the main event itself:

I don't want to call this dungeon a letdown, because it wasn't. The aesthetic design is good, and the difficulty level feels about right for someone who's half my level. It's a decent climax to the questline. But it's just not as interesting as the Carved Cave. It's essentially linear. There are branches, but they're false choices: all roads lead to the end, and every possible path uses each of the seven keys exactly once. At the end, you battle the Guardian of Lost Light and some other creatures in a fairly hectic fight. Victory earns you a badass sword and shield with unique models. Neither is useful to me, but I pose for a quick screenshot anyway:

Then I use them to decorate my wall. They look a lot smaller up there, I must say.

Anyway, as I mentioned, after this I decided to pick up some contracts and get to work on them. Results, unfortunately, were discouraging. Aun Ralirea is doable, but tedious because Ralirea is a random spawn. I check the wiki for advice, and find a quote from Severlin (a Turbine employee who frequents the official forums) that says, basically, "camp the spawns". Uh, really? Dark Majesty came out in 2001... nope, no excuse for this kind of slipshod design. I say "Eff this" and run Frozen Fury instead, only to get absolutely murdered by the Drudges in the first area of the dungeon. Making matters worse, my sleeves AND leggings drop on my corpse! I have to go back for them, but in my experience walking into a dungeon that's already killed you once means getting killed again. However, I have an idea. Risky, but plausible. I head back to the dungeon, dodging most fights along the way. After getting in, I ignore the drudges and burn rubber towards my corpse. They swing on me repeatedly, but I can handle their melee for a few seconds without dying. Once I get to the corpse, I open it, grab my armor -- leaving the drop items behind -- and as soon as I've got them I double-click the Gem of Worth I got back in the Assault Weapons quest. Success! I get out alive with about 60 health to spare.
After that I take a quick run through the Serpent Clan Training Camp, because I need to burn off some vitae and want another gem in case I have to make a quick exit sometime. Also, I need to remind myself I don't suck at this game. I take a crack at Assault (Low), but it turns out similarly -- although less fatally -- to the Frozen Fury quest; a long trek through the wilderness, ending in a dungeon I am nowhere near prepared for.
Deciding that contracts are not my style, I instead decide to run a questline that I want to: The Undead Mechanic quest. This is a fairly old quest which was intended to add purpose to some old dungeons that weren't being run a lot. Basically, there's a set of 20 little machine pieces in dungeons of varying levels around Dereth. The quest involves grabbing them all and bringing them to an NPC on Marae Lassal. Sound like fun? Okay, let's get started. First stop:

I heard some minor lore once way back when that a grocer had used this dungeon as a storehouse or something. This explains why random foodstuffs spawn all over the place. The dungeon is laughable easy with my current stats. The closest thing to a boss is a level 8 skeleton, and every enemy goes down in one shot. Still, the floorplan isn't bad, with a lot of lever/door action and one tricky one that opens via a pressure plate, letting enemies rush you from behind. I find the Alloy Device and get out quick. Since this makes for a lame post, I poke around Rithwic and do some sightseeing.

These two dungeons are also lame lowbie content, and I tackle them mainly for completeness' sake. They're at least interesting aesthetically, though. The Gallery Tower is, as the name suggests, a large underground tower with tunnels and catwalks. I get the feeling it was intended as some kind of ad-hoc PvP arena. There's also a corridor that holds several different paintings, which would have been interesting before you could buy them and hang them in your house.

The Drudge Nest is about as simple as dungeons get. It's a single, large cavern with some drudges, nothing more. Still, there's something magnificent about it. A kind of grandiosity in that huge, cavernous room. I beat up the drudges, looting nothing of importance, and then head on.

This is a worthy quest, but also a little lame. Basically, out west of Rithwic, near an exploration marker, is a portal guarded by a pair of rifts: bundles of energy wearing virindi-esque masks. Kill them, and you get a message indicating that you've "changed", which flags you to enter the portal. Beyond is a dungeon full of Dolls of level 20-60, and an occasional Rift. It looks pretty awesome from the screenshot above, but honestly? Not so much. There's two problems: one, it's about twice as long as it should be. Two, it's totally linear. Annoyingly so, actually. It has this obnoxious habit of giving you 4-way intersections where two paths immediately dead end, making them glorified corners. That may sound like nit-picking, but after the twelfth time you arrive at a junction, look around, and confirm that yes, there's only a single way onward, you start to get the feeling the level designer is laughing at you.

The boss is a unique Virindi named Dirrich, who drops in interesting bracelet (The Shackles of Obedience) and an Obsidian Shard. On the description's prompting, I turn the shard in to a scholar at Zaikhal, who somehow manages to interpret from it a journal which tells of Dirrich's interactions with a rebellious Virindi named Aerbex. This all ties into the game's second-year story arc, and we might hear more or if someday.
And that's it. Sorry if this was a lame entry, but the first few stages of the Undead Mechanic quest are like this. So I'll do my best to spice them up with interesting side-trips as I go.
My current stats:

The Carved Cave

Yes, it's the Sword of Lost Light quest, one that goes back all the way to release. It was meant to be run by an allegiance, but it's still pretty awesome solo, if you've got the stats for it. It starts off with using my house chest to mule all the keys onto Kalixia. Then we visit Iquba (bartender at Qalaba'r) and Tibri (she of the fire spear) to gather intel. Together, the clues we gather lead us to the Carved Cave. I could look up the coordinates of the cave, but I'm feeling adventurous and decide to find it myself from Tibri's directions. It's a bit of a walk west of Al-Jalima, involving some mountain climbing (always an annoying prospect in AC,) but I find it without getting lost. On the way, I find a lifestone where a shadow armor crafter has set up shop, a dungeon that I make a note to come back for later, and an exploration marker.
Once I'm there, the cave itself shows up some very appealing level design. It's multi-level, with reasonable foes (not a challenge to me, but then again I'm almost twice the recommended level for this quest), and enough locks to be rewarding without being impenetrable to someone without lockpick. Basically, you run around a large, multi-level room full of monougas and skeletons, searching for a key. This unlocks a tunnel that leads you to another big room where you have to find another key and do some jumping. Then it's down another tunnel that spirals deep down to the final room, where you find a surprise:

Yes, at release this dungeon was the only place in the game where you could find shadows. They didn't appear throughout Dereth until a few months later. Cool, isn't it? Well, I think so.
Victory earns me the seventh and last Lost Light Key, and a portal in the chamber takes me right to the main event itself:
The Halls of Lost Light

I don't want to call this dungeon a letdown, because it wasn't. The aesthetic design is good, and the difficulty level feels about right for someone who's half my level. It's a decent climax to the questline. But it's just not as interesting as the Carved Cave. It's essentially linear. There are branches, but they're false choices: all roads lead to the end, and every possible path uses each of the seven keys exactly once. At the end, you battle the Guardian of Lost Light and some other creatures in a fairly hectic fight. Victory earns you a badass sword and shield with unique models. Neither is useful to me, but I pose for a quick screenshot anyway:

Then I use them to decorate my wall. They look a lot smaller up there, I must say.

Anyway, as I mentioned, after this I decided to pick up some contracts and get to work on them. Results, unfortunately, were discouraging. Aun Ralirea is doable, but tedious because Ralirea is a random spawn. I check the wiki for advice, and find a quote from Severlin (a Turbine employee who frequents the official forums) that says, basically, "camp the spawns". Uh, really? Dark Majesty came out in 2001... nope, no excuse for this kind of slipshod design. I say "Eff this" and run Frozen Fury instead, only to get absolutely murdered by the Drudges in the first area of the dungeon. Making matters worse, my sleeves AND leggings drop on my corpse! I have to go back for them, but in my experience walking into a dungeon that's already killed you once means getting killed again. However, I have an idea. Risky, but plausible. I head back to the dungeon, dodging most fights along the way. After getting in, I ignore the drudges and burn rubber towards my corpse. They swing on me repeatedly, but I can handle their melee for a few seconds without dying. Once I get to the corpse, I open it, grab my armor -- leaving the drop items behind -- and as soon as I've got them I double-click the Gem of Worth I got back in the Assault Weapons quest. Success! I get out alive with about 60 health to spare.
After that I take a quick run through the Serpent Clan Training Camp, because I need to burn off some vitae and want another gem in case I have to make a quick exit sometime. Also, I need to remind myself I don't suck at this game. I take a crack at Assault (Low), but it turns out similarly -- although less fatally -- to the Frozen Fury quest; a long trek through the wilderness, ending in a dungeon I am nowhere near prepared for.
Deciding that contracts are not my style, I instead decide to run a questline that I want to: The Undead Mechanic quest. This is a fairly old quest which was intended to add purpose to some old dungeons that weren't being run a lot. Basically, there's a set of 20 little machine pieces in dungeons of varying levels around Dereth. The quest involves grabbing them all and bringing them to an NPC on Marae Lassal. Sound like fun? Okay, let's get started. First stop:
Filos' Doom

I heard some minor lore once way back when that a grocer had used this dungeon as a storehouse or something. This explains why random foodstuffs spawn all over the place. The dungeon is laughable easy with my current stats. The closest thing to a boss is a level 8 skeleton, and every enemy goes down in one shot. Still, the floorplan isn't bad, with a lot of lever/door action and one tricky one that opens via a pressure plate, letting enemies rush you from behind. I find the Alloy Device and get out quick. Since this makes for a lame post, I poke around Rithwic and do some sightseeing.
Dungeon Gallery Tower and A Drudge Nest

These two dungeons are also lame lowbie content, and I tackle them mainly for completeness' sake. They're at least interesting aesthetically, though. The Gallery Tower is, as the name suggests, a large underground tower with tunnels and catwalks. I get the feeling it was intended as some kind of ad-hoc PvP arena. There's also a corridor that holds several different paintings, which would have been interesting before you could buy them and hang them in your house.

The Drudge Nest is about as simple as dungeons get. It's a single, large cavern with some drudges, nothing more. Still, there's something magnificent about it. A kind of grandiosity in that huge, cavernous room. I beat up the drudges, looting nothing of importance, and then head on.
A Stable Rift

This is a worthy quest, but also a little lame. Basically, out west of Rithwic, near an exploration marker, is a portal guarded by a pair of rifts: bundles of energy wearing virindi-esque masks. Kill them, and you get a message indicating that you've "changed", which flags you to enter the portal. Beyond is a dungeon full of Dolls of level 20-60, and an occasional Rift. It looks pretty awesome from the screenshot above, but honestly? Not so much. There's two problems: one, it's about twice as long as it should be. Two, it's totally linear. Annoyingly so, actually. It has this obnoxious habit of giving you 4-way intersections where two paths immediately dead end, making them glorified corners. That may sound like nit-picking, but after the twelfth time you arrive at a junction, look around, and confirm that yes, there's only a single way onward, you start to get the feeling the level designer is laughing at you.

The boss is a unique Virindi named Dirrich, who drops in interesting bracelet (The Shackles of Obedience) and an Obsidian Shard. On the description's prompting, I turn the shard in to a scholar at Zaikhal, who somehow manages to interpret from it a journal which tells of Dirrich's interactions with a rebellious Virindi named Aerbex. This all ties into the game's second-year story arc, and we might hear more or if someday.
And that's it. Sorry if this was a lame entry, but the first few stages of the Undead Mechanic quest are like this. So I'll do my best to spice them up with interesting side-trips as I go.
My current stats:

Subscribe to:
Comments (Atom)